


When your reverse camera says "No Signal," it means the monitor is powered on but not receiving a valid video feed from the rear camera. The camera may still be physically mounted in place - but something between the camera and the screen is broken, disconnected, or incompatible.
In most cases, the fix is simpler than you might expect. A loose video connector, a bad power connection, or an incorrect monitor input setting can all produce this warning. In other cases, the camera itself may have failed due to water damage, corrosion, or prolonged vibration.
This guide walks through the most common causes of a backup camera no signal problem, how to diagnose the issue step by step, and when it makes sense to repair versus replace.
One distinction matters before diagnosis: a factory reversing camera and the rear recording camera in a dual-channel dash cam may be mounted in similar locations, but they do not necessarily share the same power, video, control, display, or storage path. The first part of this guide covers the general "No Signal" fault. The vehicle-specific dash cam sections explain where the diagnostic path changes for a rear recording channel.
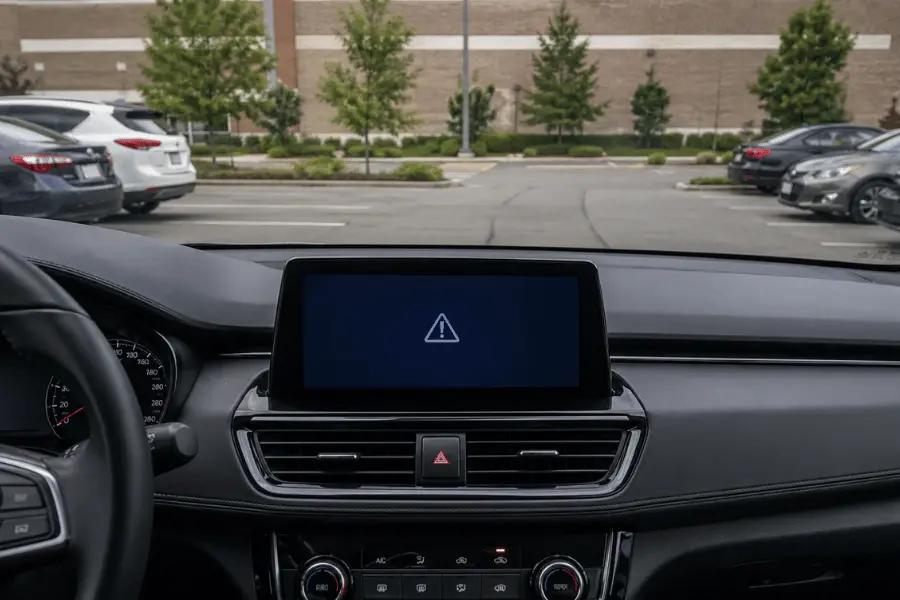
What Does "No Signal" Actually Mean?
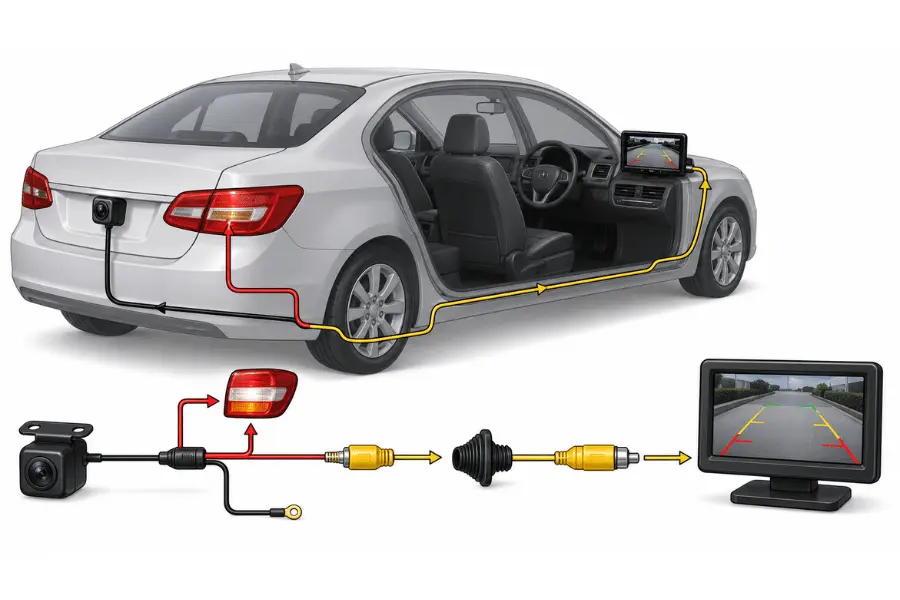
A reverse camera system follows a straightforward signal chain: the vehicle shifts into reverse, the reverse light circuit or trigger wire activates the camera, the camera powers on and sends video through a cable or wireless transmitter, and the monitor switches to the camera input to display the image.
If any link in this chain fails, the screen may display "No Signal," a blue screen, a black screen, or simply no camera image. The key point is that "No Signal" usually indicates a transmission problem - the monitor is working, but the video feed is not reaching it. This is different from a monitor that will not turn on at all, which points to a display power issue instead.
First Identify Which Rear Camera Has Lost Signal
A backup camera and a rear recording camera may be mounted in similar locations, but they follow different signal paths. The factory reversing camera sends a live safety image to the infotainment display when Reverse is selected. A rear dash cam sends recorded video to a front DVR or memory card and normally does not use the reverse-light trigger, AV1/AV2 input, or parking-guideline circuit.
| What Has Stopped Working? | System to Diagnose | First Check |
|---|---|---|
| Infotainment display loses its reverse image | Factory or aftermarket backup camera | VIN recall, head-unit software, reverse trigger, and camera harness |
| Reverse image works, but no rear recording appears | Dual-channel dash cam rear channel | Front DVR rear-camera port, app channel status, and rear data cable |
| Front and rear recordings are both missing | Main dash cam power path | Rain-sensor adapter, ACC/B+ supply, ground, and DVR status |
| Failure started after hatch or headliner work | Either system | Flex section at the hatch, displaced connector, and cable routing |
If the reverse image still works but the dash cam rear camera is not working, do not change CVBS/AHD or reverse-trigger settings. Inspect the rear-camera input on the front recorder, replay files from the memory card rather than relying only on the app preview, and substitute a known-good rear cable before replacing the camera. This fault path applies to front-and-rear recording systems; it does not apply to a factory camera controlled by the head unit.
Buyers who need continuous front-and-rear evidence recording rather than a replacement reversing display should evaluate a vehicle-specific integrated dash cam. Its front housing is molded for the vehicle's mirror cover, while the optional rear channel connects to the front DVR. It must not be marketed as a replacement for the vehicle's regulated rear-visibility system.
Separate the Reverse Display, Live Preview, and Saved Recording
For a dual-channel integrated dash cam, "the rear camera is not working" can describe three different failures: the vehicle does not show a reverse image, the dash cam app does not show a rear preview, or the memory card does not contain a rear recording. These observations should be recorded separately.
| Factory Reverse Image | Dash Cam Rear Preview | Rear Recording on Card | Diagnostic Direction |
|---|---|---|---|
| Missing | Not yet checked | Not yet checked | Start with the vehicle's rear-visibility system, VIN-specific service information, recalls, and DTCs |
| Works | Missing | Present and playable | Investigate app version, Wi-Fi session, channel mapping, preview decoding, or permissions before opening the vehicle trim |
| Works | Present | Missing or corrupt | Investigate channel configuration, encoding, storage compatibility, file finalization, and firmware |
| Works | Missing | Missing | Investigate the matched rear module, rear cable, front DVR rear port, connector engagement, and released hardware/firmware combination |
| Works | Missing intermittently | Missing intermittently | Record whether the failure follows ignition, parking-mode wake, temperature, drive time, hatch movement, or app connection |
| Works | Front and rear both missing | Front and rear both missing | Diagnose the main DVR power, boot, storage, or system firmware before replacing the rear camera |
The rear channel in a vehicle-specific dash cam should be diagnosed against its approved architecture. Do not assume it uses the reverse-light trigger, AV1/AV2 selection, an RCA connector, a 12 V camera input, or a CVBS/AHD menu simply because those items appear in a general reversing-camera guide. Depending on the product, the front DVR may power, initialize, receive, encode, and store the rear stream through a matched cable and proprietary interface.
Start with four non-destructive checks:
- Replay the original memory card files instead of relying only on the phone preview.
- Confirm that the front DVR, rear module, rear cable, firmware, and app belong to the same released configuration.
- Inspect both cable endpoints, connector locks, and the route through any hatch or liftgate flex area.
- Compare the failed set with a known-good matched set approved for the same vehicle variant.
This distinction lets the general reverse-camera sections remain useful while preventing a dash cam rear-channel complaint from being sent down the wrong fault path.
Quick Diagnosis: Match Your Symptom to the Most Likely Cause
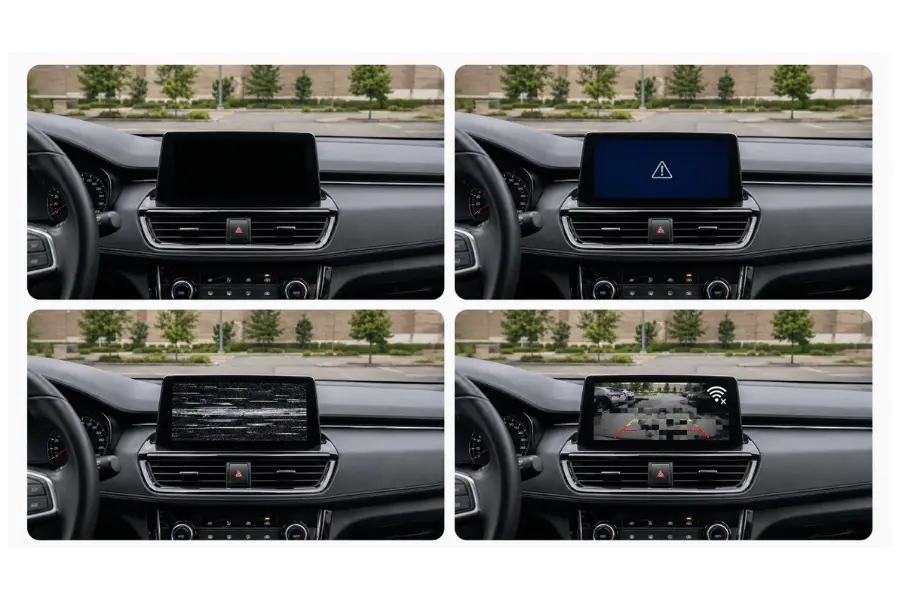
Before diving into a full inspection, use this table to narrow down where to start based on what you are seeing:
| Symptom | Most Likely Cause | Where to Check First |
|---|---|---|
| Monitor on, shows "No Signal" | Video cable disconnected, camera has no power, or wrong input selected | Monitor input setting, then video cable and camera power |
| Screen completely black | Monitor power issue, head unit software, or display brightness | Monitor fuse, head unit reboot, brightness setting |
| Camera works sometimes but not always | Loose connector, weak ground, or vibration-related cable movement | Tailgate wiring, ground connection, connector joints |
| No signal only after rain or car wash | Moisture inside the camera housing or connector | Camera lens for fog, connector for corrosion |
| Wireless camera keeps dropping signal | Weak transmitter power, interference, or distance | Transmitter and receiver power supply, antenna position |
This gives you a starting point. The sections below go deeper into each cause and the specific steps to fix it.
Common Causes of Reverse Camera No Signal
1. Loose or Damaged Video Cable
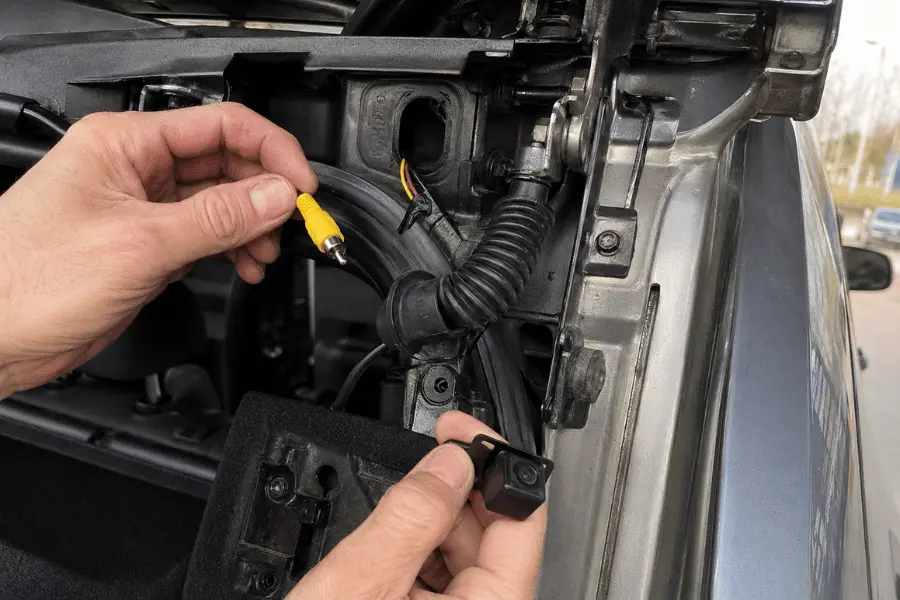
For wired backup cameras, the video cable is the single most common failure point. Most aftermarket systems use an RCA video cable or a dedicated camera harness running from the rear of the vehicle to the head unit or monitor. If the connector is loose, corroded, pinched against metal, or broken internally, the monitor will power on but display no camera image.
This problem tends to show up after specific events: a tailgate repair, rear bumper replacement, car stereo installation, or simply years of vibration in trucks and commercial vehicles. In practice, the cable section near the tailgate hinge is especially vulnerable because it bends every time the tailgate opens and closes. If you have recently had bodywork done on the rear of the vehicle, check this area first.
2. Camera Has No Power
A reverse camera needs a stable power supply to generate and transmit video. If the camera loses power, the monitor will say "No Signal" even though the display itself is functioning normally.
Common power-related causes include a loose power wire, a bad ground connection, a damaged camera power cable, a faulty reverse light power source, or a blown fuse. One important detail: a camera that receives unstable or intermittent power may still appear mounted and intact from the outside but fail to produce a usable signal. If the camera's power LED does not light up when the vehicle is in reverse, start your diagnosis here.
3. Faulty Reverse Trigger Wire
Many reverse camera systems use a trigger wire to tell the monitor when the vehicle shifts into reverse. This wire carries a signal - usually from the reverse light circuit - that switches the display to the camera input automatically.
If the trigger wire is loose, incorrectly tapped, or damaged, the camera may receive power but the monitor will not know to switch inputs. Symptoms include: the camera working only intermittently, the screen staying on another input when you shift into reverse, or "No Signal" appearing specifically when you engage reverse gear. A proper installation ensures this wire is securely connected to the correct circuit.
4. Wrong Monitor Input or Signal Format
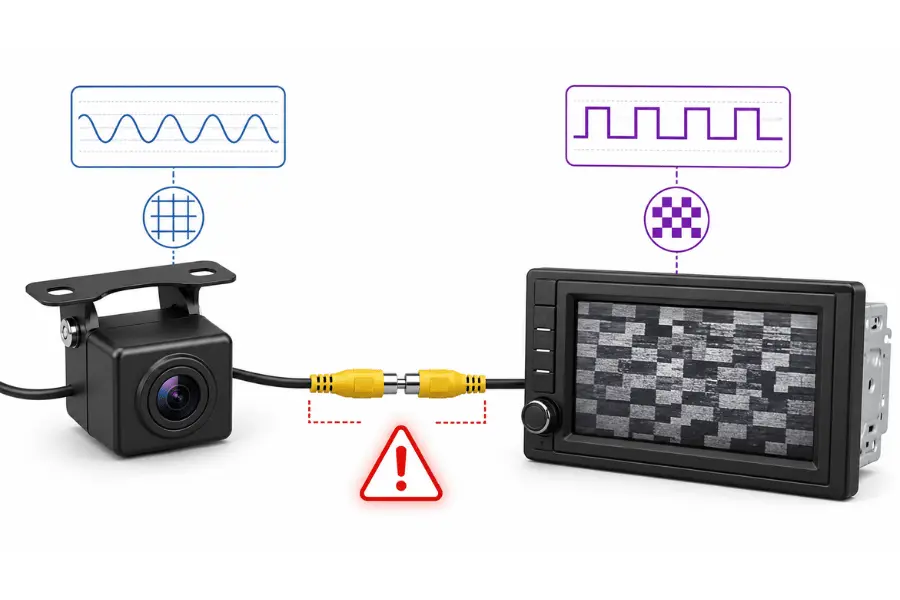
Sometimes the camera is working perfectly, but the monitor is looking at the wrong input. For example, the camera may be connected to AV2 while the screen is set to AV1. Some Android head units and aftermarket displays also have settings for camera signal format - NTSC or PAL - and input type - CVBS (standard analog) or AHD (higher-resolution analog).
Here is what you need to know about these formats: CVBS and AHD are two different analog video standards. If you connect an AHD camera to a CVBS-only monitor, the screen may show a distorted image, rolling lines, or no signal at all. Similarly, NTSC and PAL are regional video encoding standards with different frame rates. If the camera and monitor are set to different modes, the image will not display correctly. Always check your camera and monitor technical specifications to confirm they use the same signal format before assuming the hardware is faulty.
5. Blown Fuse or Weak Ground Connection
A blown fuse can cut power to the camera, the monitor, or the reverse light circuit itself. Check the fuse box for any fuse related to the camera system, reverse lights, or the head unit. Your vehicle owner's manual will usually identify which fuse controls which circuit.
A weak ground connection is harder to spot because it may cause intermittent problems rather than a complete failure. Symptoms include a flickering image, random "No Signal" messages, a camera that works when parked but fails while driving, or an image that disappears whenever the vehicle vibrates. If you notice the problem comes and goes depending on road conditions, the ground connection is a strong suspect.
6. Water Damage or Camera Failure
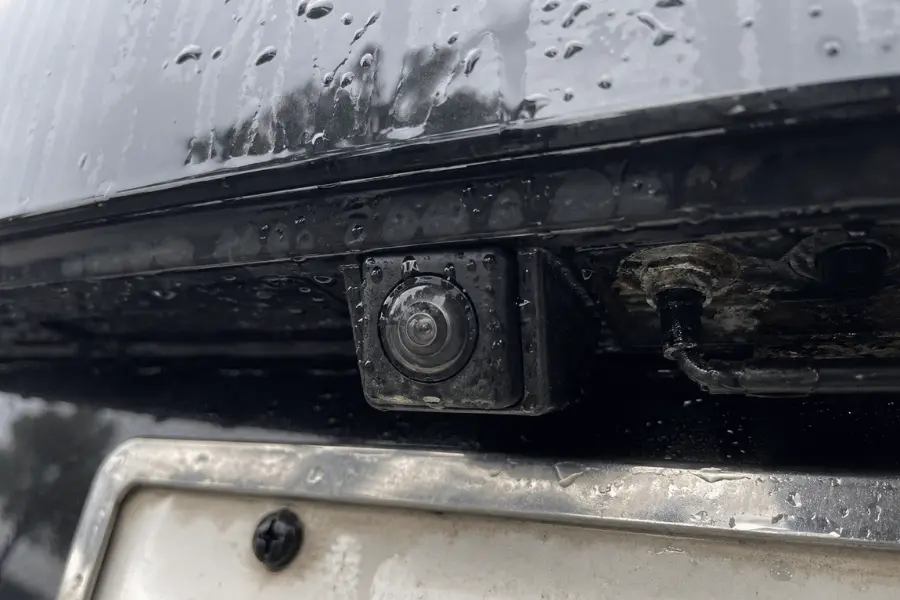
Rear cameras are mounted on the outside of the vehicle, exposed to rain, car washes, mud, road salt, dust, and constant vibration. If the camera housing is cracked or the seal has degraded, moisture will eventually reach the internal circuit board and cause failure.
Signs that suggest camera hardware failure include fog visible inside the lens, a blurry image that gradually worsened before disappearing, the camera working in dry weather but failing after rain, and visible cracks or corrosion around the camera body. When these signs are present and you have already confirmed that wiring, power, and the monitor are all functioning, replacing the camera is usually more practical than attempting a repair. Choosing a camera with proper waterproof ratings helps prevent this from happening again.
7. Wireless Signal Interference or Pairing Failure
Wireless backup cameras transmit video over a radio frequency link instead of a physical cable. While this makes installation simpler, it also introduces additional failure modes. The transmitter and receiver may fail to pair, the signal may be blocked by metal panels inside the vehicle body, or interference from other electronics - such as Bluetooth, Wi-Fi, or other wireless devices - can disrupt the feed.
Wireless signal problems are more common in longer vehicles such as trucks, vans, trailers, and buses, where the distance between the camera and the monitor is greater and there are more metal barriers in the signal path. For fleets and commercial vehicles that require consistent rear visibility, a properly installed wired camera system is often more reliable than a basic wireless kit, particularly when the cable run is long or the vehicle operates in electromagnetically noisy environments.
How to Fix a Reverse Camera No Signal Problem: Step by Step
Basic tools that may help: flashlight, soft cloth, multimeter (if you are comfortable with basic electrical testing), electrical tape, and your vehicle and camera user manuals.
Step 1: Restart the Vehicle and Shift into Reverse
Start with the simplest check. Turn off the vehicle, wait about 30 seconds, restart it, and shift into reverse. If the problem was caused by a temporary software glitch in the head unit or monitor firmware, the camera image may return on its own. This costs nothing and takes a minute.
For a Factory-Fitted Camera, Check Software and Recalls Before Opening the Harness
A restart that restores the image does not prove that the fault is fixed. When the radio and backup camera stop working together, record the vehicle identification number, software version, ambient temperature, and whether the failure occurred immediately after startup. Check the manufacturer's recall portal and the NHTSA VIN database before removing trim or replacing the camera.
A factory rearview-image failure can originate in the camera, harness, head unit, control module, power path, software, or initialization sequence. If the image returns after a key cycle, preserve DTC and freeze-frame evidence before disconnecting power, then check the VIN for open recalls and manufacturer campaigns. NHTSA's recall search can identify U.S. safety recalls, but it does not list every repaired, international, recently announced, or non-safety service campaign, so the vehicle manufacturer's service system should also be checked.
Do not disconnect the battery simply to force a reset until the vehicle service procedure has been checked. Battery removal can erase intermittent DTC evidence, require window or steering-angle relearning, and create additional faults on vehicles with coded head units. Save freeze-frame data first, then update or diagnose the module using the vehicle manufacturer's procedure.
Step 2: Determine Whether the Monitor Itself Is Working
Look carefully at the screen. Does it turn on at all? If the monitor is completely dark, the issue is likely with the display's power supply, its fuse, or the head unit - not the camera. If the monitor powers on and shows "No Signal" or a blue screen, the display is receiving power, but the video signal from the camera is not reaching it. This distinction matters because it tells you which direction to investigate: toward the monitor side or toward the camera side.
Step 3: Confirm the Correct Video Input and Signal Format
Before removing any panels or inspecting wiring, check the monitor settings. Navigate to the display's input or camera settings and verify that the correct input channel is selected (AV1, AV2, or rear camera input). Also check the signal format: NTSC vs. PAL and CVBS vs. AHD. A mismatch here is one of the most overlooked causes of "No Signal" - particularly after installing an aftermarket camera on an existing monitor, or vice versa.
Step 4: Inspect the Camera Lens and Housing
Go to the rear of the vehicle and examine the camera physically. Look for cracked housing, loose mounting, water condensation inside the lens, corrosion around the connector, or a damaged cable near the tailgate or bumper. Note that a dirty lens - covered in mud or road grime - will produce a poor image but usually will not trigger a "No Signal" warning. However, water inside the lens or corrosion at the connector can stop the signal entirely. Keeping your camera clean and inspected regularly is part of good vehicle camera maintenance.
Step 5: Check the Video Cable and Connectors
For wired systems, trace the video cable from the camera to the monitor. Pay special attention to RCA plug connections, extension cable joints, the tailgate hinge area where the cable flexes, and the connector behind the monitor or head unit. Unplug and firmly reconnect each connection point. A loose RCA connector can very easily cause a "No Signal" message, and simply reseating it may resolve the issue immediately.
Step 6: Test Camera Power, Ground, and Trigger Wire

If the cable looks intact, the next step is electrical. With the vehicle in reverse (handbrake engaged, someone holding the brake pedal if needed), use a multimeter to check whether the camera is receiving 12V power. Check the ground wire for continuity to a clean metal point on the vehicle body. Also verify that the reverse trigger wire is delivering voltage when the vehicle is in reverse.
Safety note: If you are not experienced with vehicle electrical systems, do not cut, splice, or strip wires yourself. Incorrect wiring can damage the camera system, blow fuses, or interfere with other vehicle electronics. In this case, it is safer and more cost-effective to have a qualified technician diagnose the electrical side. If your vehicle is still under warranty, unauthorized modifications to the factory wiring may void coverage.
Step 7: Isolate the Faulty Component
If the wiring and power appear normal, try swapping components to identify which one has failed. Test the camera with a different compatible monitor, test the monitor with a different compatible camera, or try a different video cable. This process of elimination helps you avoid replacing parts unnecessarily. Understanding how vehicle camera systems work can make this step easier to approach.
Before Replacing a Dash Cam Rear Camera, Capture a Reproducible Claim
Replacing several parts at once may restore the image, but it also destroys information about the original fault. For a distributor, installer, or private-label program, record the configuration and symptom before updating firmware, formatting the card, moving the cable, or substituting a module.
| Evidence Group | Information to Capture | Why the Supplier Needs It |
|---|---|---|
| Vehicle | Make, model, model year, trim, body style, sales market, LHD/RHD, and mirror or sensor-cover identification | A model family can contain several power connectors, mirror covers, roof routes, or liftgate layouts |
| Dash cam configuration | Front DVR SKU and hardware revision, rear module revision, rear cable part or batch, firmware build, app version, and memory-card specification | Similar-looking parts may not have been released or validated together |
| Symptom matrix | Factory reverse image, front preview, rear preview, front file, rear file, LED or voice prompt, timestamp, and app message | Separates display, rear-channel, storage, app, and main-DVR failures |
| Event sequence | Cold start, warm restart, ignition cycle, parking-mode wake, app connection, drive time, weather, and hatch position | Makes intermittent timing, movement, and environmental conditions reproducible |
| Installation | Photos of both connector endpoints, locks, cable route, bend areas, strain relief, rear glass or hatch position, and nearby vehicle equipment | Shows whether the fault follows the installed route rather than the returned module |
| Original evidence | Unedited clips, card files, logs, photos, DTC record, and failed samples labeled with the claim ID | Prevents the only evidence from being lost during repeated resets or rework |
When a compatible golden sample is available, change one element at a time. Substitute the rear cable, rear module, and front DVR only with parts approved for the same configuration, and record whether the failure follows the part, the complete set, the firmware build, or the vehicle.
| Result of the Controlled Swap | Stronger Diagnostic Direction |
|---|---|
| The fault follows one rear module into a known-good configuration | Rear module hardware, programming, or revision |
| The fault disappears with a known-good rear cable and returns with the original cable | Cable, terminal, connector retention, shielding, or route damage |
| Several known-good rear sets fail on one front DVR | DVR rear port, power/control stage, firmware, or PCB revision |
| The complete set works in an approved vehicle but fails in one trim or model year | Fitment matrix, adapter, available power, installation route, or vehicle interaction |
| Hardware works with one software combination but not another | Firmware initialization, compatibility, channel mapping, encoding, or app behavior |
Electrical or signal measurements should be made only at approved test points using the product schematic and acceptance limits. A generic continuity check or "look for 12 V" instruction may not prove that the rear interface remains valid while booting, recording, moving, or operating under load.
Handle video, location, vehicle, and customer information under the project's privacy and retention rules when sharing a claim.
Troubleshooting by Specific Symptom
Monitor On but Displaying "No Signal"
When the screen powers up but shows "No Signal," do not start by replacing the monitor - the display is working. Instead, check in this order: verify the correct input channel and signal format, inspect the video cable and its connectors for looseness or damage, and confirm that the camera is receiving power. In an aftermarket monitor installation, the video cable, selected input, camera power, and signal compatibility are reasonable first checks. In a dual-channel dash cam, verify the rear recording path separately because the rear module may connect to the front DVR rather than the vehicle display.
Screen Completely Black (No Display at All)
A fully black screen is a different problem from "No Signal." It typically means the monitor itself is not receiving power or the head unit has a software issue. Check the monitor fuse, try rebooting the head unit, and verify the display brightness has not been turned all the way down. If other head unit functions work (radio, navigation) but the screen stays black when reversing, the issue may be with the reverse trigger signal to the monitor rather than the monitor's power.
Camera Works Intermittently
Intermittent failures are the most frustrating to diagnose because the system appears to work normally during inspection. The most common causes are a connector that is making partial contact, a ground wire attached to a corroded or painted surface, a cable that moves or bends with tailgate operation or vehicle vibration, or moisture that builds up gradually in a connector and evaporates later. Focus your inspection on the points where the cable passes through the tailgate hinge, where ground wires attach to the vehicle body, and where connectors are exposed to the elements.
No Signal Only After Rain or Car Wash
If the camera fails reliably after exposure to water and then recovers after drying, moisture is entering the system somewhere. Check for water condensation inside the camera lens, cracks in the camera body, poorly sealed connectors at the rear of the vehicle, and corroded terminals. Using waterproof connectors and proper sealing during installation prevents most moisture-related failures.
Wireless Backup Camera Losing Signal Repeatedly
For wireless systems that keep dropping the connection, verify that both the transmitter and receiver have stable power - a weak power supply is the most common wireless failure cause. Then check antenna position (antennas should not be behind large metal surfaces), distance between the transmitter and monitor, and whether any new electronic devices have been added to the vehicle recently that could cause interference. If the vehicle is long - such as a truck with a trailer, a van, or a bus - and the wireless system cannot maintain a stable signal, switching to a wired system is often the most practical long-term solution.
Common Mistakes to Avoid
When troubleshooting a reverse camera no signal issue, a few common mistakes can lead you in the wrong direction:
- Assuming a dirty lens causes "No Signal." A dirty or mud-covered lens will produce a blurry or dark image, but the monitor will still detect a video signal. "No Signal" means the video feed is absent, not just poor quality.
- Confusing "black screen" with "No Signal." A black screen may mean the monitor has no power, while "No Signal" means the monitor is on but not receiving video. These are different fault paths that require different troubleshooting.
- Replacing the camera first. The camera is only one part of the system. In many cases, the cable, connector, power supply, or input setting is the real problem. Always test before replacing.
- Ignoring signal format compatibility. Connecting an AHD camera to a CVBS-only monitor, or mismatching NTSC and PAL settings, will result in no image - even though both devices are powered and working individually.
Wired vs. Wireless: No Signal Issues Compared

| System Type | Common No Signal Causes | Best Approach |
|---|---|---|
| Wired reverse camera | Loose RCA cable, damaged harness, bad ground, no camera power, trigger wire fault | Inspect wiring, connectors, power, and trigger wire systematically |
| Wireless reverse camera | Interference, weak transmitter power, pairing failure, excessive distance, metal barriers | Verify power to both transmitter and receiver, check antenna position, re-pair the system |
| Factory (OEM) camera | Head unit software fault, tailgate harness damage, OEM control module issue | Scan the vehicle's diagnostic system or consult a dealer technician |
| Aftermarket camera | Incorrect input setting, poor installation wiring, incompatible signal format (CVBS/AHD, NTSC/PAL) | Verify installation quality, check monitor settings, confirm camera and monitor format compatibility |
When to Replace the Camera, Monitor, or Full System
Replace the Camera When:
The camera has visible water damage, internal lens fog, cracks in the housing, or signs of corrosion - and still produces no video even after confirming that the power supply, wiring, and monitor are all functioning. If the image quality degraded gradually before the signal was lost entirely, this also points to camera hardware failure. Before ordering a replacement, match the camera, connector, power requirements, video interface, and receiving device to the original system. For a factory-fitted reverse camera, identify the part through the VIN and OEM service information. A rear dash cam is a separate recording product and should not be used as a substitute for the vehicle's required reverse-view system.
Replace the Monitor When:
The screen does not power on at all, other video inputs also fail to display, the display freezes or restarts on its own, or the monitor cannot support your camera's signal format. In most cases, if only the camera input fails while other functions work, the issue is more likely on the camera or wiring side rather than the monitor itself.
Replace the Full System When:
In older aftermarket installations where the camera, monitor, and wiring are all several years old, poorly installed, or using outdated signal formats, replacing the complete system as a matched kit is often more cost-effective and reliable than troubleshooting and replacing individual components. A matched system ensures signal compatibility and typically includes all the necessary cables and connectors for a clean installation. This replacement logic applies to a matched aftermarket reversing-camera kit. It does not automatically apply to a factory rear-visibility system or to the rear recording channel of an integrated dash cam; those systems should be diagnosed against their original vehicle and product configuration.
For Distributors and Vehicle-Specific Dash Cam Programs
A repaired backup camera restores the reversing view, but it still does not provide continuous incident recording. Distributors and private-label programs that need a separate recording product should compare universal windshield units with an OEM style dash cam designed around the original mirror cover.
| Procurement Dimension | Vehicle-Specific Requirement | Reject or Recheck When |
|---|---|---|
| Fitment | Match model year, mirror-cover part number, sensor package, and LHD/RHD trim | Supplier lists only the vehicle brand or model family |
| Front power | Plug-to-plug adapter validated on the exact rain-sensor connector | Installation requires cutting the factory harness or produces DTCs |
| Rear channel | Cable length and connector locked for the sedan, SUV, or liftgate route | Cable crosses a curtain-airbag deployment path or lacks strain relief |
| Mold status | Existing dedicated housing or quoted new-tool ownership | A custom fit dash cam is a universal body with an adapter plate |
| Compliance | Reports match the PCB, enclosure, and installed Wi-Fi module | Certificate shows a different model, applicant, or radio module |
During vehicle approval, define ignition, sleep/wake, front-and-rear recording, app playback, memory-card playback, and liftgate or hatch checks according to the vehicle and installation route. Use an agreed cycle count and acceptance criteria in the test plan instead of presenting one generic number as sufficient for every body style.
Program terms should be confirmed for the exact vehicle application. Existing housing availability, connector and harness revisions, firmware work, branding requirements, sample quantity, and the customer's validation plan can all affect sample and production timing. Treat every released housing, adapter, rear cable, camera module, and firmware combination as a controlled configuration rather than approving one sample for an entire vehicle brand.
Compliance files should contain more than certificate logos. For a 2.4 GHz hidden dash camera, request the applicable FCC equipment-authorization record for the U.S.; for Europe, obtain the RED Declaration of Conformity and radio/EMC reports such as EN 300 328 and EN 301 489. Vehicle EMC claims should identify the UN R10 approval series and approval number. IATF 16949 supports the supplier's quality-management process, but it is not a product compliance certificate.
Turn One Rear-Channel Failure Into a Closed Supplier Action
A returned camera is not a root-cause report. Close the issue by identifying the released configuration, reproducing the failure, confirming which layer the fault follows, and validating the correction under the original trigger condition.
The first diagnostic priority depends on when the failure appears:
| Project Stage | Priorities to Investigate |
|---|---|
| Sample approval | Exact mirror or sensor-cover variant, adapter pinout, rear cable length, route feasibility, body style, LHD/RHD, and hardware/firmware compatibility |
| Installer rollout | Connector-lock confirmation, cable trapped by trim, unclear routing, insufficient strain relief, hatch flex loop, and gaps in the work instruction |
| Production or incoming inspection | Cable assembly, terminal retention, soldering, PCB or component revision, firmware programming, mixed BOM, test-fixture coverage, and lot traceability |
| Field operation | Vehicle sleep/wake behavior, long-duration recording, repeated hatch movement, vibration, climatic exposure, moisture at an exterior module, update path, and unapproved vehicle variants |
A corrective action should contain:
- Containment: affected SKU, hardware and firmware revision, cable batch, vehicle applications, production or installation date, and market;
- Confirmed cause: the repeatable condition and evidence showing why the failure belongs to design, component, assembly, firmware, fitment, installation, or vehicle interaction;
- Controlled correction: the drawing, BOM, firmware, fixture, supplier process, installation guide, label, or compatibility database revision;
- Verification: the original failure condition plus relevant regression tests, with acceptance criteria set before the test;
- Release and traceability: the first conforming lot or software build and an updated matrix showing which front DVR, rear module, cable, app, and vehicle application are approved together.
Validate the Released Configuration, Not Just a Camera Sample
Vehicle-specific approval should cover the complete installed configuration. Bench video alone does not confirm housing fit, vehicle power behavior, rear cable routing, sleep/wake operation, file integrity, radio performance, or long-term connector movement.
| Validation Area | Evidence to Request or Retain |
|---|---|
| Vehicle fitment | Exact make, model year, trim, market, body style, mirror or sensor package, LHD/RHD, housing and adapter identification, and installed route photos |
| Operating states | Defined ignition, shutdown, sleep, wake, parking, app connection, front/rear recording, file closing, and recovery sequences |
| Electrical loads | Test plan and results for the applicable vehicle supply conditions and released harness; ISO 16750-2:2023 is one recognized framework, but OEM-specific limits still govern the project (ISO) |
| Mechanical and climatic loads | Requirements selected for the actual front unit, rear module, connector, and cable mounting positions; ISO 16750 Parts 3 and 4 address mechanical and climatic loads (ISO 16750-1, Part 3, Part 4) |
| Exterior enclosure and connector | Test evidence tied to the production enclosure, seal, connector, vent, and installed orientation; ISO 20653:2023 defines road-vehicle IP-code protection and verification methods (ISO) |
| EMC and radio | Current requirements for the target vehicle and market, with reports tied to the installed PCB, radio module, enclosure, cable, and firmware. For the EU, determine the applicability of the European Commission's EMC and Radio Equipment Directive frameworks rather than relying on certificate logos alone |
| Installation robustness | Controlled work instruction, connector and route checkpoints, airbag and moving-trim precautions, strain relief, hatch service loop, final recording check, and installer feedback |
| Configuration control | BOM, compatibility matrix, serial or lot traceability, firmware history, app compatibility, and the first conforming build after a change |
Standards provide frameworks, not one universal dash-cam test recipe. The applicable edition, test level, acceptance criteria, and legal route should be confirmed for the target market, vehicle, mounting position, and released product.
How to Prevent Reverse Camera Signal Problems
Preventive design, installation checks, and configuration control can reduce avoidable signal failures and repeated diagnosis. The following practices reduce the likelihood of "No Signal" failures:
Use waterproof connectors for any exterior connections and seal all cable entry points. Avoid sharp bends in the cable, especially near the tailgate hinge, and secure wiring away from moving parts and heat sources. After any bumper, tailgate, or rear bodywork repair, inspect the camera cable and connector before closing panels. Confirm that the camera and monitor use the same signal format before installation - not after. For ongoing maintenance, periodically inspect the camera housing for cracks and the connectors for corrosion, particularly on vehicles that operate in wet, dusty, or salt-heavy environments.
A well-planned camera installation that accounts for cable routing, waterproofing, and signal compatibility from the start can reduce avoidable "No Signal" issues down the line.
Is It Safe to Drive Without a Working Reverse Camera?
You should never rely solely on a reverse camera when backing up - always use mirrors, turn to check your surroundings, and reverse carefully. That said, a functioning rear visibility system is an important safety feature that significantly reduces the risk of backover accidents.
In the United States, the National Highway Traffic Safety Administration (NHTSA) issued a final rule under FMVSS No. 111 covering passenger vehicles, trucks, buses, and low-speed vehicles within the applicable classes, generally at or below 4,536 kg (10,000 lb) GVWR. Full compliance applied to covered vehicles manufactured on or after May 1, 2018. The required view includes a 10-foot by 20-foot zone directly behind the vehicle and additional requirements for image size, response time, durability, and deactivation.
The often-cited figure of 210 fatalities and 15,000 injuries was the historical light-vehicle backover estimate used in NHTSA's 2014 final-rule analysis; it should not be presented as a 2025 or 2026 annual count. The current regulation text is maintained in 49 CFR Section 571.111.
If your reverse camera is not working, it is best to address the issue promptly. While you can still drive safely using mirrors and direct observation, restoring the camera ensures you have the full benefit of the rear visibility system your vehicle was designed to provide.
When to Stop DIY and Call a Technician
Basic checks - restarting the vehicle, verifying the monitor input, cleaning the camera lens, and reseating loose connectors - are safe for anyone to perform. However, consider calling a qualified automotive electrician or camera installer if you need to trace wiring behind interior panels, if you are unsure which wire is the power, ground, or trigger wire, if you need to test voltage with a multimeter but have not done so before, if the vehicle is under warranty and unauthorized electrical work could void coverage, or if the vehicle uses a factory-integrated camera system controlled by the OEM head unit. A professional diagnosis often saves time and money compared to replacing parts by trial and error.
FAQ: Reverse Camera No Signal
Why does my backup camera say "No Signal" but the screen turns on?
Can a blown fuse cause a reverse camera "No Signal" problem?
Yes. If the blown fuse controls the camera's power circuit, the reverse light circuit, or the monitor, it can prevent the system from working. Check your vehicle's fuse box and owner's manual to identify the relevant fuses. Replacing a blown fuse is a quick and inexpensive fix that is worth checking early in the process.
Why does my reverse camera only work sometimes?
Intermittent failures usually point to a connection that is making partial contact - such as a loose RCA connector, a corroded ground wire, a cable that flexes near the tailgate hinge, or moisture that accumulates and then dries in a connector. Inspect the areas where cables move, bend, or are exposed to the elements.
Does "No Signal" always mean the camera is broken?
No. In many cases, the camera hardware is fine. The problem may be a disconnected video cable, a power supply issue, a wrong input setting, a blown fuse, or a trigger wire fault. Always test the full signal chain - power, cable, connector, monitor input, and signal format - before concluding that the camera itself needs replacement.
Why does my wireless backup camera keep losing signal?
The most common causes for wireless systems are weak or unstable power to the transmitter or receiver, interference from other electronics in the vehicle, excessive distance between the camera and monitor (common in trucks, vans, and trailers), poor antenna positioning behind metal panels, and pairing issues between the transmitter and receiver. If the problem persists after checking all of these, switching to a wired system may provide a more stable connection.
What is the difference between CVBS and AHD for reverse cameras?
CVBS (Composite Video Baseband Signal) is the traditional analog video standard used in most older backup cameras. AHD (Analog High Definition) is a newer standard that transmits higher-resolution video over the same type of coaxial cable. The two formats are not interchangeable - an AHD camera connected to a CVBS-only monitor will not display an image. Always confirm that your camera and monitor support the same format. Many newer monitors support both, but it is important to check the technical specifications before purchasing.
Why does the backup camera work but the rear dash cam does not record?
If the reverse image still appears on the infotainment screen but no rear recording is saved, diagnose the dash-cam rear channel rather than the vehicle's backup camera. On a vehicle-specific dual-channel recorder, the rear module connects to the front DVR, so AV1/AV2 selection, CVBS/AHD mode, and the reverse trigger are not part of this fault path. Confirm the rear channel in file playback, reseat the front DVR's rear port, inspect the cable at the liftgate flex point, and test with a known-good cable or rear module.
What should a distributor send when an integrated dash cam rear camera fails?
Send the exact vehicle model, model year, trim, market, body style, and mirror or sensor-cover identification; the front DVR, rear module, cable, hardware, firmware, app, and memory-card versions; the status of the factory reverse image, front files, rear files, and app preview; the shortest repeatable event sequence; connector and routing photos; original files or logs; and the result of any one-part-at-a-time swap with an approved golden sample. This lets the supplier separate a rear module fault from a cable, DVR, software, fitment, or installation issue.
Should I replace just the camera or the entire system?
If the monitor, wiring, and power supply are in good condition and compatible with a new camera, replacing only the camera is the most economical choice. However, in older aftermarket installations where the wiring is degraded, the signal format is outdated, or the overall installation quality is poor, replacing the complete camera and monitor kit as a matched system is usually more reliable and can save time on troubleshooting compatibility issues.
If you are sourcing a vehicle-specific integrated dash cam rather than repairing a universal reversing-camera kit, review our integrated dash cam range and send the exact vehicle model, model year, trim, sales market, mirror or sensor-cover photos, front-only or dual-channel requirement, planned quantity, and project stage through the project contact form. For an existing sample or field issue, include the diagnostic evidence listed above.


